How to teach a child to cut with scissors starts with knowing what cutting takes: finger strength, coordination between both hands, following the line and planning every movement. That is why it is learned in stages, not all at once.
Before scissors: strong hands
Opening and closing scissors is a lot like squeezing a clothespin. Games like clothespins by color and moving pom-poms with tweezers prepare the hand for this movement.
Step 1: Thumbs up
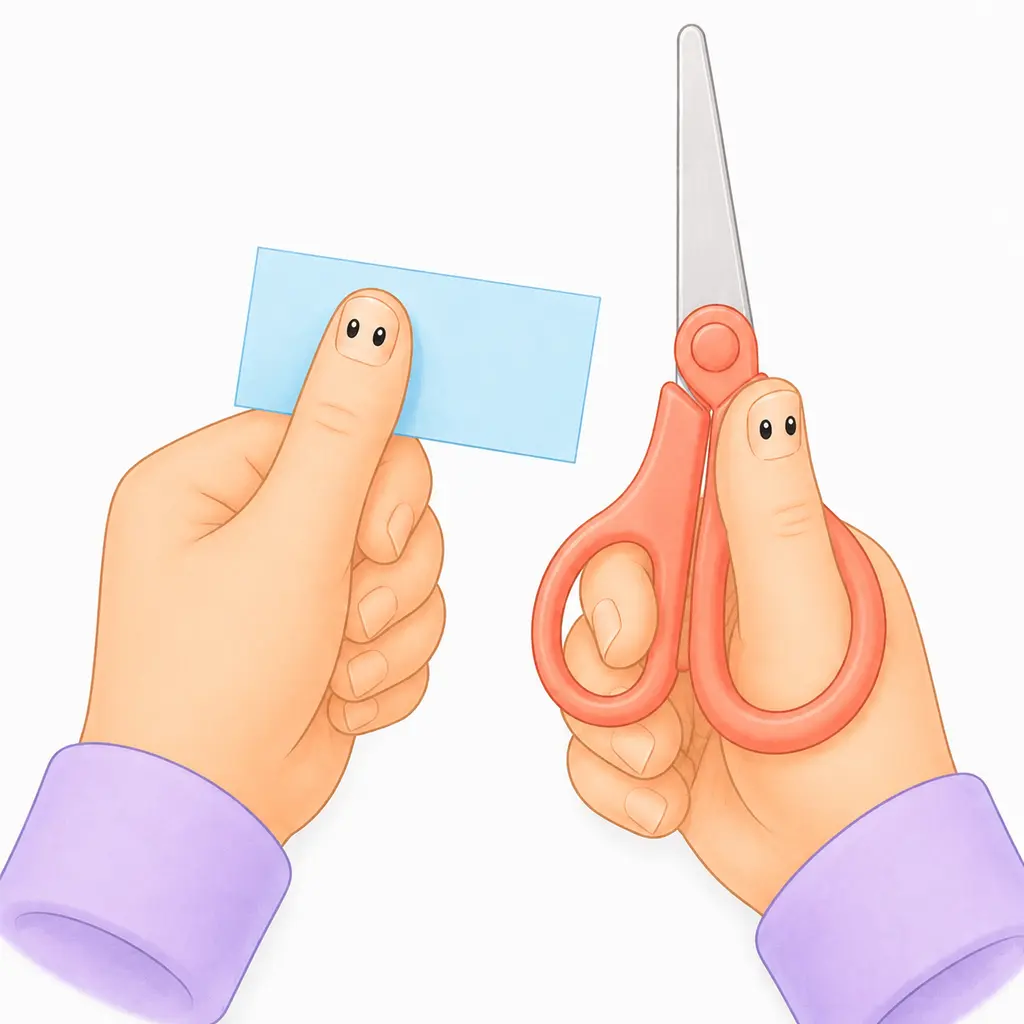
The thumb goes in the small hole and the middle finger in the big one, with the thumb pointing at the ceiling. Draw a small face on the thumbnail: if you can see it, the grip is right. The other hand holds the paper with its thumb up too.
Step 2: Small snips
Narrow strips of cardstock that are cut in one snip, then "grass" or "hair" along the edge of a page. A haircut for a character turns this practice into a game.
Step 3: A straight line
A thick line on stiff paper. The helper hand moves the paper forward, and the scissors stay straight in front of the body.
Step 4: Curves and shapes
Zigzags, curved lines, and only then circles and shapes. When cutting a circle, the helper hand turns the paper, not the scissors.
Which scissors to choose?
- Small scissors with a rounded tip that really cut. Scissors that don't cut only frustrate.
- For left-handed children: left-handed scissors, so the line stays visible.
- For children without the strength yet: spring-loaded scissors that open by themselves.
How to teach a child to cut with scissors, by age
Around 2½ to 3, children start opening and closing scissors and making small snips. Around 4, most cut along a straight line, and by 5 to 6 they cut circles and simple shapes. These are ranges, not a test, but if cutting is still very hard at 5, it's worth talking with an occupational therapist.